
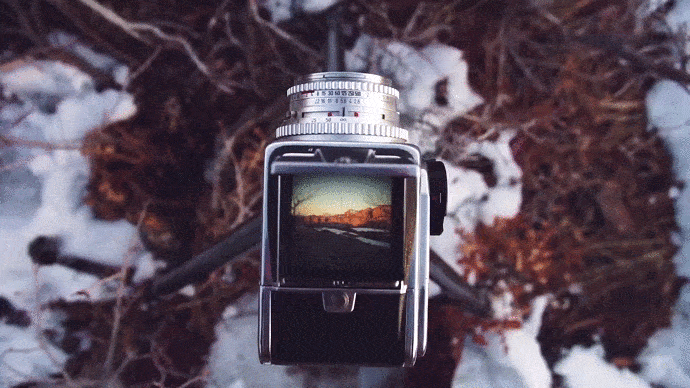
After a picture session has been completed successfully, the next step for a photographer is to begin making preparations for uploading their work to a computer for digital adjustments to the image.
However, the process that occurs between taking the photograph and having it published has a significant impact on whether or not the final product can be considered a masterpiece.
In the field of photography, this step is referred to as post-processing, often sometimes called post-production. Editing the photographs is merely one part of the post-production process.
After the photography session, there is a series of work that must be completed before the pictures may be shown to the public.
In this article, I will make an attempt to address the question, “What is post production and post processing in photography?” and my aim is that at the end of it, you will have a much better understanding of the topic.
What exactly is meant by the term “post production”?
My viewpoint on post-production could give a lot of photography experts second thoughts, but to me, “post” implies “after,” and “production” refers to the process that anything goes through in order to be made.
Therefore, post production should refer to all of the processes that take place after the actual filming and continue until the finished product is created. The post-production process includes:
Moving everything over to the computer and creating several copies of everything there
You should organize the photographs you take and look for the best one.
Using picture editing software to make changes to them
You should also fix any stains, flaws, and blurry photographs.
Get the materials ready for printing, so that they may be shared, and posted.
What exactly is meant by “post processing”?
Post processing is a subset of post production that refers to all of the procedures of picture editing that a photographer completes after the shooting portion of the project has been completed.
Post production and post processing are not synonymous, despite the fact that this is a common misconception among us.
The post-processing workflow for images in photography encompasses a variety of editing styles that are performed with photo editing software.
If you want to publish your photographs in a faultless manner after they have been post-processed, you will need to hire an expert in image editing services.
Images that are taken straight from the camera may have a variety of problems, such as dust, grain, spots, framing problems, exposure problems, white balance problems, and so on. If you don’t take care of these problems, you won’t be able to build the masterpiece you’ve been envisioning for so long.
Let’s have a look at a couple of the photography-related factors that call for post-processing done by a professional.
1. Overexposure Issue
Overexposure
When using the HDR approach, photographers would purposefully take photographs that are both overexposed and underexposed.
However, photographers who have only recently begun their careers occasionally take photos with an excessive amount of exposure and only realize their mistake after the fact during post-production.
In that circumstance, they have no choice but to use picture post processing in order to make the necessary adjustments to the post-production photos.
Therefore, if you ever miss the correct exposure when shooting, don’t let it shake your self-assurance because the post-processing of your photographs may salvage an otherwise fruitless day of labor.
If you are looking for free ways to restore an overexposed photo, you can also check out our advice on how to edit an overexposed photo.
2. The Problem with the White Balance
Adjusting the white balance
The white balance problem is especially problematic for photographs taken inside. Incorrect white balance gives photos a look that is either too yellow or too blue.
After projecting the image onto a larger screen, the problem becomes much clearer to us, although at first we might not have recognized it. Your photo’s white balance may be quickly and simply adjusted after you’ve taken it using post-processing software.
3. Take pictures in the RAW format.
RAW mode
The majority of digital cameras are pre-configured to take pictures in the JPEG format by default. The JPEG image format, on the other hand, adds very little alteration to the picture while making it appear more subdued than it actually is and locks down the settings.
JPEG files are not editable, and any attempt to do so will result in a degradation of the picture quality.
On the other hand, an image captured in RAW format contains all detail that the camera is capable of capturing and is preserved in its original state for post-processing.
Shoot in RAW mode and get as many shots of each detail as you can if you want the final product of your post-processing photos to be immaculate and perfect. This is the advice I’d give you.
4. HDR Photographing HDR photography
When photographers wish to record every nuance of the high dynamic range present in the backdrop of a shot, they employ the HDR method of shooting. Photographers take pictures using a variety of exposures, which can range from overexposed to underexposed.
During the post-processing phase, professional photo editors combine all of the photographs to create an HDR image. After that, they do image retouching to correct any problems that were discovered.
Processes Involved in Post-Processing Photographs
Process Flow for Post-Processing
What we refer to as “photography post processing workflow” is the procedure that experienced Photoshop users go through to transform an average picture into an extraordinary one. This is known as “photo post processing.”
When it comes to picture editing in Photoshop, the post-processing workflow includes six phases that are very necessary and should never be skipped. The instructions may be found down below.
Edit the image by cropping and resizing it.
Examine and Correct The Black and White of It
Adjust The Level Of Exposure
Adjust the hue and the saturation.
Remove the Noise and Grain from These Photographs.
Verify that the Sharpness Is There
It is not a difficult task to edit photographs and give them a stunning appearance with editing software. If you have even a fundamental understanding of Photoshop and always follow the post-processing method, you can make any of your images appear professional grade.
What exactly is meant by the terms “production” and “post production”?
The importance of post-processing cannot be overstated.
What is the most effective software for post-processing photographs?
It doesn’t matter whose definition of post production photography or post processing you believe; regardless of which you choose, you can’t choose one and leave the other behind.
In this piece of writing, I made an effort to explain the concepts of post production and post processing in photography using terms as basic as possible. If you’ve read the post and want to offer your opinions on it, you can do so in the comments section below.
However, there is one thing that we can all agree on, and that is the significance of post-processing and picture post-production in the creation of outstanding photographs.
Do you consider yourself a novice yet want to enhance your post-processing abilities?
That is the central topic of discussion in this essay. You will learn five post-processing techniques that, if used, will quickly elevate the quality of your photographs to the next level. The best part is that you won’t even have to struggle to put these suggestions into practice, and all you’ll need is the simplest image-editing software to do so.
Let’s just get right in, shall we?
post-processing advice altered images of boats on water
1. To get a more polished and professional effect in your photographs, make sure the horizon is level.
Even to the untrained eye, something is obviously awry when there is a break in the horizontal plane of the horizon. They might not be able to identify the specific problem, but they will recognize that the scene does not appear to be in the correct order.
Because of this, you must ensure that your horizon is perfectly straight at all times.
You can make the necessary adjustments to the horizon in any post-processing tool, which is a fortunate turn of events.
Following are the steps that need to be taken in order to rectify the horizon using Photoshop:
First, choose the Crop tool from the toolbar.
Step 2: Select the Straighten option from the menu at the top of the screen.
Step 3: Click one side of your horizon, then drag across the horizon line before letting go of the mouse button.
Your horizon will immediately begin to align itself!
Photoshop adjustments to straighten up the boats
2. To achieve photographs that have a natural look, adjust the white balance.
The white balance setting on your camera is responsible for adjusting the color temperature of the light being captured by the camera so that it is as near as possible to appearing white.
You have to make use of the white balance option in order to save the day when the color of your subject is distorted because of the lighting circumstances that are currently in place.
Now, getting the white balance just right in the camera is one method for achieving the desired results when setting the white balance. On the other hand, some photographers find it easier to shoot in RAW while using the auto white balance setting and then manually change the white balance after the fact.
If that is the look that you want to go for, you will need to select the white balance in the post-processing tool that you use. To pick a white balance option that adapts to the lighting of your photo is often a simple and straightforward process. You are also at liberty to experiment with the various white balance settings so that you may select the one that most accurately conveys your artistic intent.
For illustration purposes, the image below was edited in Adobe Camera Raw to have a Fluorescent white balance applied to it.
white balance settings for Adobe Camera Raw
And here is the same scene, but with a white balance set to Shade:
Adobe Camera Raw post-processing white balance adjustments
3. Increase the contrast in your photographs to make them stand out.
Do your pictures have a somewhat two-dimensional appearance?
Changing the contrast of your images might be one of the quickest and easiest methods to make them stand out. The regions of your image that are darkest and brightest can be more differentiated with a contrast adjustment. To put it another way, it deepens the dark tones while bringing out the brightness of the brighter ones.
Consequently, increased contrast causes tones to stand out and imparts a sense of three-dimensionality upon your photographs. Look at the image above and compare it to the one below; in the second image, I increased the contrast, which gives it a noticeable pop.
A contrast slider is included in the vast majority of image editors. In many cases, all that is required to increase the contrast is a simple move of the slider to the right.
So just remember:
Try boosting the contrast in your photographs if you find that you are having trouble giving them more life. It’s a basic post-processing trick, but it can really make a difference in your photos!
4. To achieve more pleasing hues, raise either the saturation or vibrance sliders.
It’s common practice to place the saturation and vibrance adjustment sliders adjacent to one another, which might lead to confusion. Both of them will give your picture an additional splash of color, but they will do it in very different ways.
Because of this, you may change the strength of any hue in your image by adjusting the saturation setting. If you move the saturation slider in the direction of the plus sign, the color saturation of the entire image will be increased. As a result, you should only make this modification when absolutely necessary.
Vibrance, on the other hand, is a “smarter” saturation tool, meaning that it only modifies the colors in your image that are already fairly saturated. Increasing the vibrance will have a more noticeable effect on the colors that are already saturated, while having little effect on the colors that are not yet saturated.
Increasing either the saturation or the vibrance of your photographs will, in most cases, result in an immediate improvement.
5. Bring out the details in your photographs to get the finest possible presentation online.
It is quite possible that your pictures will be published somewhere on the internet.
On the other hand, when you export your images from the majority of image-editing apps, you will find that the photos have a hazy appearance. Unless, of course, you hone your skills for the online.
In Photoshop, you may accomplish the sharpening effect in a few different methods. You can give the following a shot:
The first thing you need to do is resize your image to the dimensions you want it displayed in. (If you sharpen your high resolution/original image and then downsize it, the image will give the impression of losing its sharpness. When sharpening a picture, it is best to do it at the resolution of your display.)
Guidelines for the post-processing of picture scaling
Step 2: Make a copy of your current layer.
Desaturate your newly created layer by selecting Image > Adjustments > Desaturate from the main menu.
bringing out the best in your images
The fourth step is to switch the blend mode to Overlay. (Alternatively, you might utilize the Soft Light mix mode to achieve a more understated result.)
Step 5: Now apply a High-Pass filter by going to the Menu and selecting Filter > Other > High Pass. For an image that is 730 pixels wide, choose a radius that is somewhere around 2.0. (on the long side). Because you selected the Overlay option up above, you are now able to observe the effect that the radius has on the picture and experiment with adjusting it.
Take note that the size of your image will determine the size of your radius.
If the sharpness does not appear well across the entire image, you may use a layer mask and paint black over the parts where you wish to hide the effect. This is an option if the sharpness does not look good across the entire image.
Step 6: Save the document for the web by selecting “Save for Web” from the “File” menu. If the Convert to sRGB option is not already ticked, you should do it now.
These post-processing pointers are an excellent place to start whether you are just beginning your adventure into photography or if you are trying to enhance your fundamental editing abilities.
In point of fact, you can frequently drastically improve your images with with the most fundamental of edits.
If you put these suggestions into practice, you should see an improvement in your photographs.
What is Photo Post Processing?
What is Photo Post Processing? It is a type of digital image editing. The most common use for this is in editing photos for websites and printed materials. Digital photo editing has become a multi-million business, and there are a lot of digital image editing programs available for consumers to use at home.
When you want to change the look or feel of your photos through editing, what you need to do is open up the photo-editing program and choose the “Edit” button. You will then be able to see a wide variety of different options from which you can choose. For example, you might like to add a special effect to your photo such as a vine or flower. Some photo editing programs also have a feature that allows you to crop or resize photos.
If you need some assistance with digital photo editing, all you need to do is search for some digital photo editing tutorials on the internet. A quick search on Google should produce several hits, and most of these tutorial websites should offer step by step instructions for you to follow. These sites will also provide you with any warranty or guarantees that may be offered. Keep in mind, that even though the tutorial website may offer great tips, if you try to apply them and do not do them correctly, it could make your photo look worse. Be sure to follow the steps exactly as they are given, and do not delete any essential data or information from your photos just to save a few seconds of time.
What is Photo Post processing? There are a lot of digital image editing programs available for consumers to purchase. The main difference between most digital photo editing programs is that some are better than others, and it depends on what you want to accomplish with your digital pictures editing.
What is Photo Post processing? Most editing programs for digital cameras offer basic editing features. For example, if you want to remove red eye from your photos, you would select an editing program like Adobe Photoshop. The first thing you will notice is that when you use any digital editing program, you will see the image of your digital photo in the monitor. Once you click on the image, you will be able to see your digital photo.
Now, if you want to adjust colors, tones and other characteristics of your picture, you will do that by clicking on the appropriate icon in the editing software. In the earlier days of digital cameras, this process was done manually. But, today, thanks to advanced digital editing software, it is very easy for anyone who uses such digital cameras to edit the images they have taken. You will notice the change once you save the image in your computer. The image that you see in your computer is the same one that your digital camera captured.
You may wonder how Photo Post processing technology could have become popular in recent years. Actually, this technology has been around for quite a long time. It was developed in the 1970s, and at that time, digital photography used to be expensive and difficult to use. Today, editing software for digital cameras is available for anyone to purchase. Thanks to these software programs, anyone can edit and modify their digital images.
What is photo post processing technology? A software program makes it easy for anyone who uses a digital camera to edit their photos. Nowadays, anyone can edit and modify the photos they take. If you have been taking pictures of your family for years but want to give them a unique look, editing software makes it possible. If you are someone who wants to create an original photo, this editing software will be of great help.
Photo Editing Software – Our V verdict on Canva

If you have taken any digital photographs and been looking at how to make them into a work of art, you will most likely have realized that professional grade photo editing software is very expensive. However, this is actually a good thing, because the photographer is going to be able to do all of the editing they want to, anyway. The trick to editing digital photos properly is to know how to use the software, rather than trying to learn just the basic steps. If you are interested in learning how to edit digital photos, here are some photography tips that may help you out.
There are three ways in which you can edit a photograph with photo editing software. You can simply use the buttons on the software to do your editing, one by one. This is by far the easiest option, but it can also be the longest way to go. The right photo editing software will help bring focus to a picture, emphasize your key points and transform a bad photo into something truly amazing. But the biggest question for all photographers really is: how can you select the proper editing software to complement your skills?
The first place you should check out is your local computer or movie store (if you have one) for a free photo editor. You may be able to download one there, or they may be included as a free CD with your next copy of Windows. Most decent computer stores carry a wide range of these free photo editors, and you may even be able to borrow some of them if you take care of a few errands before visiting. Once you get home, you should definitely review the different features of each one to decide which one suits you best.
Next, you should check out one of the two verdicts on the screen. A verdict is usually a simple statement about the highest rated software of each category. It can give you an idea of what software is the best suited for your needs and which one falls short of your expectations. There is a big difference between a verdict and a recommendation, however, so make sure you are aware of what a verdict is actually saying. That should give you a good idea of what kind of editing features you can expect from Photo Capture One Pro, Fotor Photo Editor, and Adobe Elements.
The second thing to look for in Photo Editing Software is color correction. Most people simply rely on their cameras’ sensors to get the job done, but the color correction is not something you can’t do without. If you can’t edit your photos without including color corrections, then your photo editing software has got to offer a full suite of digital photo correction tools.
Another useful feature to check for is the number of brushes available. There should be at least a large number of brushes, if not several dozen, available in your photo editing software. The more brushes a program has, the better the quality of your image retouching. This is because you will have various kinds of things to use the brushes for. It is possible to make an entire canvas full of retouched photos. This feature alone could earn you several new customers, but if you want to sell more, you’ll want to take advantage of the zoom function as well.
Lastly, look for the user-friendly interface of a Photo Editing Software program. A good photo editing software will be able to change your photos easily by using the click and drag interface. The interface must be very easy to use and understood by anyone, regardless of their technical skill level. The best photo editing software programs will also include a comprehensive help page or a forum where you can ask questions. This feature goes a long way in making Photo Editor software a worthwhile investment.
That’s it – our verdict on Canva Photo Editor. This was a brief overview of this popular photo editing tool. Now that you’ve finished reading this article, you should know more about it and how it can help you.
0 Comments