
What does it mean to have a shallow depth of field?
Jeff Carlson, a seasoned photographer, explains that shooting with a small depth of field means “having a plane that is in focus, and everything else is out of focus.” It’s more of a technical decision that’s affected by the aperture setting on your lens. Carlson states that “if you have a wide aperture, the lens is allowing in more light” in any given situation. “The impact of having a shallow depth of field will become more pronounced as more light enters the scene.”
Making use of a camera in a photograph with a shallow depth of field
When taking images, a shallow depth of field may be produced by using a low f-number, also known as an f-stop, which ranges from approximately 1.4 to roughly 5.6 and allows more light into the camera. Your plane of focus will now be anywhere between a few inches and a few feet as a result of this. You may choose to blur either the foreground or the backdrop of your shot, depending on the topic you want to capture and the region of focus you want to use. When your camera has a lower f-stop value, often known as a wider aperture, more light will enter the camera. This indicates that your shutter speed should be quick enough to prevent overexposure, which can result in the whites in your shot becoming blown out. It is essential for achieving good shallow depth of field to have a solid understanding of the relationship between all of the settings on a DSLR camera, including aperture, shutter speed, focal length, and ISO. For instance, the depth of field will be reduced when the focal length of the camera is increased.
Increasing the distance that exists between the camera, the subject, and the backdrop is yet another way to get a narrow depth of focus. Even if you don’t have a lens that can achieve really wide apertures like f/1.4, you may still get a pleasing impression by backing up from your subject and zooming in on them, or by ensuring that they are clearly differentiated from the surrounding environment. When compared to a person who is leaning on one of the trees or against a solid wall, the backdrop created by a person who is standing 20 feet away from a group of trees produces a softer effect.
“Shallow depth of field is one of the easiest ways to emphasize a subject as a novice photographer,” says photographer Derek Boyd. “If you want to highlight a topic, shallow depth of focus is one of the easiest ways to achieve it.” It is a superb tool that helps guide your viewer’s attention to what is vital in the picture that you are showing them. You may imbue more importance into your shot by singling out a certain element of the composition while blurring the remainder of the picture. According to photographer Stephen Klise, you can also use it to “defocus anything to pique someone’s curiosity and make them wonder more about it.” In other words, by making the subject of an image somewhat blurry, you may add depth and mystery to the picture.
A similar observation is made by photographer Hannah Concannon, who states that “with a small depth of focus, you can really highlight an intriguing aspect of your shot.” “A few months ago, I participated in a picture session in which I had a bouquet of flowers, and then I spotted these small black plastic houseflies hiding among the petals. I would just place one in there to check if I could focus, and make the narrow depth of field solely center on the housefly.” A shallow depth of field can help catch the attention of a spectator and bring attention to an unexpected element.
Photographer Cheryl Medow achieves stunning results when she photographs birds in their natural environments by utilizing a short depth of focus. Because the camera was set to a short depth of field, the birds themselves are in sharp focus, but the surrounding is entirely out of focus. Because of this, she is able to effortlessly take off the subject’s surrounds and construct amazing composite compositions, giving her work a surrealist quality.
Taking a shot with a shallow depth of focus using the camera of another photographer.
However, composite pieces are not the sole application for backdrops that have been obscured. Carlson relates the following anecdote: “You’re out shooting, and something attracts your eye: a flower, a person, or a landmark. Because of the way our eyes operate, we tend to concentrate on it and believe that it would make for an excellent shot. You snap a photo, you’re satisfied with it, and then you go on to the next thing. When you look back at the photo later, you notice that you didn’t do a very good job of scouting the area before taking it. And so, you may have that flower, but there might also be an overflowing garbage can in the background that you didn’t notice because you were concentrating on that thing that drew your attention.
In situations like these, having a small depth of field might be beneficial. It allows you to concentrate on what really important, blotting away the irrelevant flaws in your composition while simultaneously elevating it.
The importance of depth of field in portraiture
When it comes to portraiture, employing a shallow depth of focus is something that gets a lot of attention, according to Klise. In portraiture, it is common practice to emphasize particular elements of a subject’s face. When you want the spectator to feel as though they have a close connection with the subject of the photograph, achieving a narrow depth of field on the subject’s eyes might be a vital step. A shallow depth of field is another tool that may be used to assist remove distracting elements from the background. But, “there’s a significant degree of hit or miss” when employing shallow depth of field in portraiture, Klise says. For example, if the depth of field is shallow, but the emphasis is just on the person’s nose, then you’ve missed the point and hidden the viewer’s connection to your subject.
If you are photographing a portrait in a dim setting, you might need to widen your aperture to f/1.4 in order to gather enough light from the surrounding surroundings to get an adequate exposure. However, doing so results in a narrow depth of field, which increases the likelihood that your subject may seem fuzzy. You are able to correct this inadvertent narrow depth of field by increasing your aperture to f/5.6 or f/8. This will ensure that the subject of your photograph is completely in focus. However, with this aperture, you will most likely want extra artificial illumination in order to achieve an exposure that is satisfactory. Alex Tan, an art director and photographer, advises newcomers to “understand and grasp the artificial manipulation of lighting, such as strobes and continuous light.” Do not allow yourself to become overawed by the world of artificial lights; this is only an opportunity to study. In addition, having the appropriate lighting equipment at your disposal enables you to construct the finest photo possible and get the shallow or deep depth of field that you choose.
Difficulties arising from a short depth of field.
Boyd notes that another challenge associated with short depth of field is that “occasionally, individuals may overdo it.” This problem arises in addition to the fact that it causes your depth of field to be too shallow. You shouldn’t take advantage of it, and you shouldn’t allow this instrument to turn into a crutch that you depend on excessively. If each of your images is taken in the same manner, you will miss out on the chance to test the limits of your creative potential. Avoid making your photographs less fascinating by providing too much direction to the viewer. Your shot can be lacking in narrative progression if there is only one subject to focus on in the frame.
When working with a short depth of field, one of the primary challenges is ensuring that your field of focus is sufficiently large and located in the appropriate area. Boyd provides the following explanation: “I advise bracketing: Take a few pictures, starting with one with an f-stop of 1.2, then one with an f-stop of 1.8, then one with an f-stop of 2.0, and so on. If you take three pictures, hopefully one of them will have everything in focus that you want and will leave anything out of focus that you don’t want. The use of bracketing is especially helpful in portrait photography because it increases the likelihood that the subject’s whole face will be in sharp focus.
“When you truly want to know what you’re receiving when you’re utilizing shallow depth of field, then manually focus your camera and zoom close,” says Boyd. “This will give you the most accurate representation of what you’re seeing.” The majority of cameras are designed to focus on people’s faces, and they are easily distracted by portions of your image that have a high contrast. By switching your DSLR camera to manual mode, you will have complete control over the location of the shallow depth of field that you wish to achieve.
“While you truly want to know what you’re getting when you’re utilizing shallow depth of field, then manually focus your camera and zoom close,” the article advises.
When taking pictures with a narrow depth of focus, you should avoid using a wide-angle lens. It is easier to capture a large depth of field using wide-angle lenses, which means that the whole scene may be brought into sharp focus. When it comes to landscape photography, having a precise focus and a large depth of field are both desirable qualities. Instead of putting unnecessary pressure on yourself to succeed, try using a longer focus length.
How to boost your ability to concentrate.
The greatest way to learn is via actual experience. Get behind the camera and practice shooting if you want to become an expert in the technical aspects of shallow depth of focus. It is recommended that you “shot either in manual mode or aperture priority mode,” as stated by Carlson. He recommends that novice photographers pick a subject that is easy to photograph and practice focus bracketing. Go back and look at the variations once you’ve taken the identical photo with a variety of apertures. Check out the degree of detail that each image offers, and become familiar with the range that each depth of field offers.
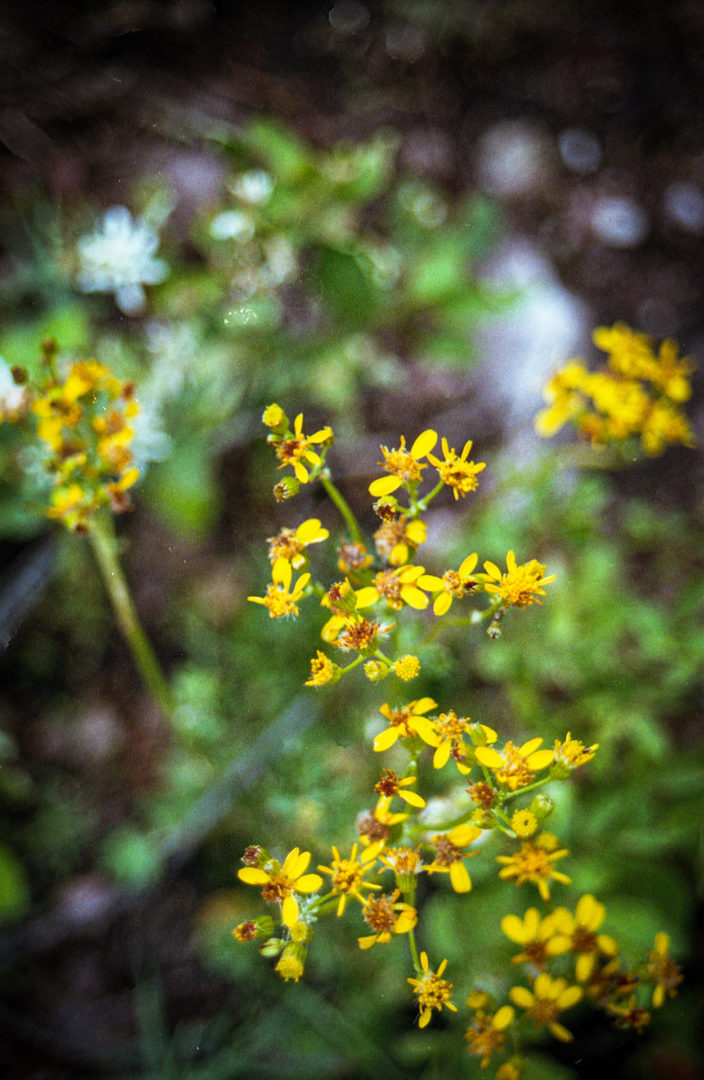
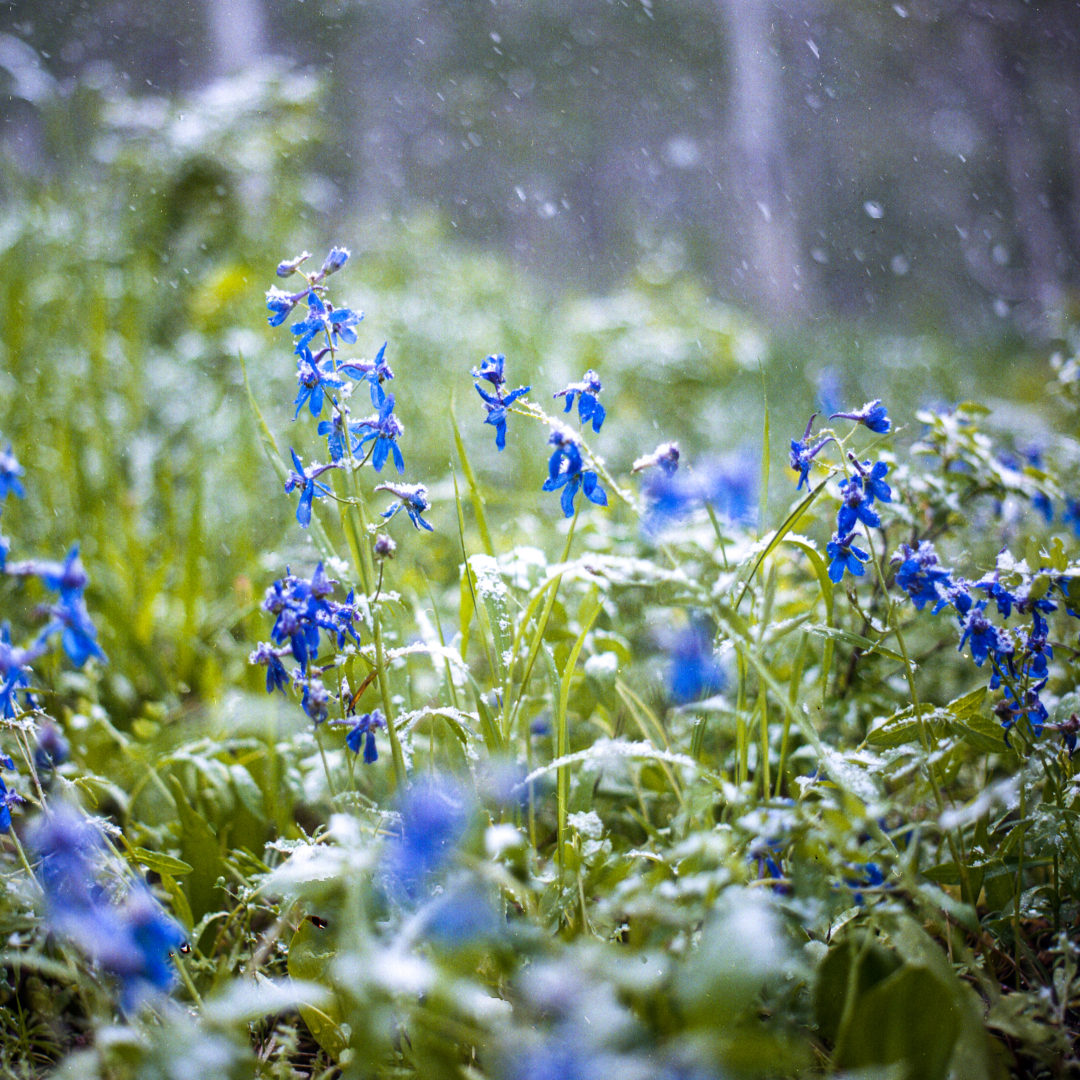
An photograph with a sharp focus and a shallow depth of field of a blossom in orange and red.
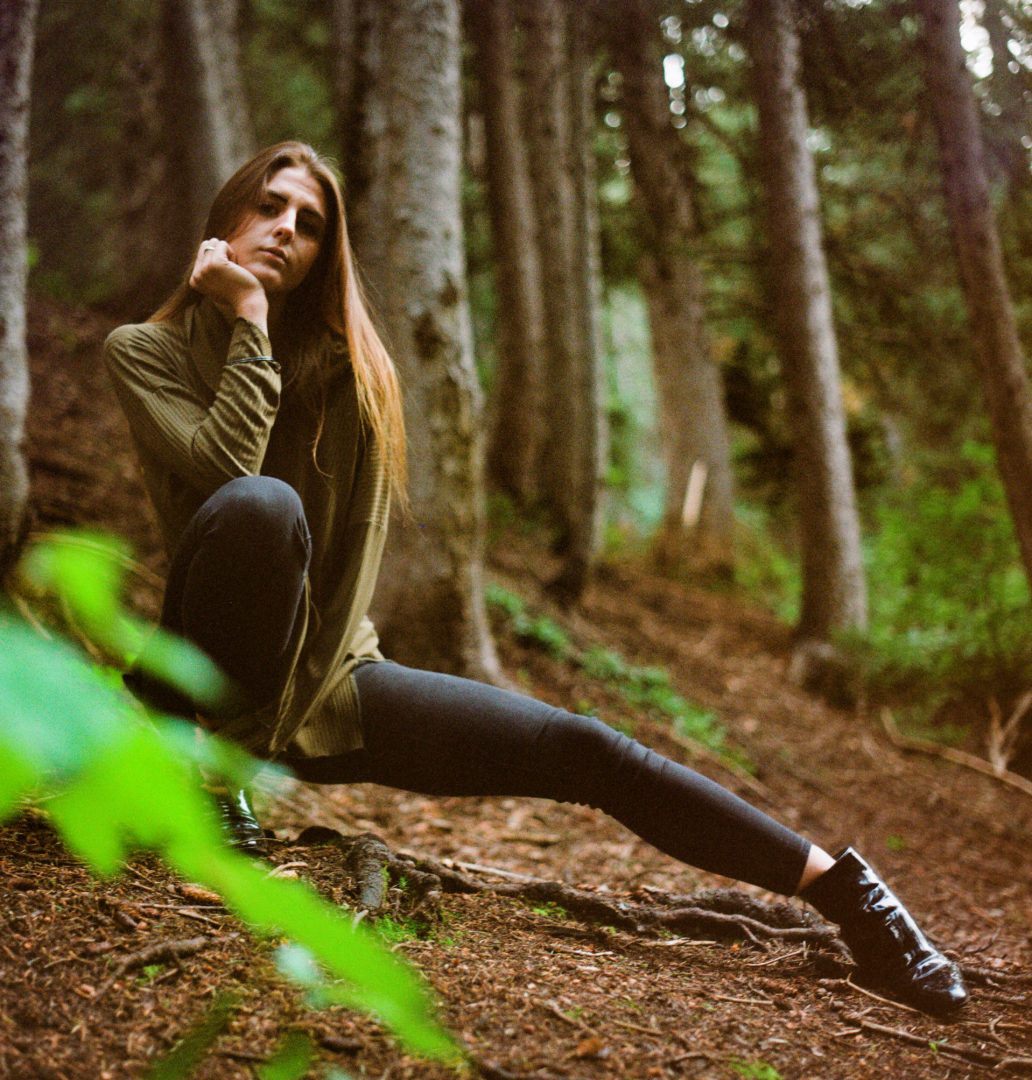
A stunning portrait with shallow depth of focus, featuring a woman with auburn hair and tattoos
Focusing on the narrative that your shot is trying to tell is another method to improve your shallow depth of field photography. Is there a particular thing that can’t be left out of the tale that your picture is trying to tell? Try with several levels of depth of field, such as shallow and deep, and see how the adjustments affect the story. In the end, photography is all about telling a story, and methods such as shallow depth of focus are decisions an artist may make to emphasize and magnify that tale. In the event that you weren’t successful in achieving the desired depth of field during shooting, you can always adjust the amount of blur in the final image using post-processing software. Check out this lesson to learn how to choose a focal point in your image using Photoshop. It will get you started. Your ability to change the blur and depth of field in your images may be enhanced by developing a fundamental grasp of these straightforward techniques.
What steps are you going to take to implement shallow depth of field into your own photography, now that you are familiar with its ins and outs? Keep in mind that this is a technical option that might aid in communicating the aesthetic vision that you have. Photographers need need to have a solid understanding of and familiarity with this instrument. However, you shouldn’t make this your default camera or aperture setting because it’s simple for unintended movement to throw your subject out of the narrow plane of focus you’ve created with it. Macro photography is a great place to start if you want to learn more creative applications of shallow depth of field because close-up photographs by their very nature have a very narrow depth of focus. If that is not the case, be deliberate about where you place your focus point, and give this strategy a shot.

Defining Shallow Depth Of Field
What does it mean when the depth of field is small?
The words “shallow depth of field” and “small depth of field” are interchangeable and refer to the same thing. One may also refer to them as shallow depths of field or even narrow depths of field. Yes, it is possible to become perplexing, but it is not a very challenging idea to grasp if you are familiar with both depth of field and aperture.
A lens’s depth of field may be changed by adjusting the aperture setting. Make sure you have a good understanding of these concepts, but if you don’t, I’ll give you a brief review so we can go on to discussing what factors contribute to a narrow depth of field.
What exactly is Aperture?
The zone of acceptable sharpness that extends in front of and behind the subject that the lens is focused on is referred to as the depth of field. It basically refers to how fuzzy or crisp the area around your subject is in the photograph that you took.
The blurriness and sharpness of the image are both controlled by the aperture of the camera, which alters the size of the opening in the lens. Now let’s talk about how we can get a narrow depth of field. First, let’s get the appropriate definition of it, and then we’ll look at how to really execute it.
What does it mean to have a shallow depth of field?
The limited or restricted region of an image that is in focus is referred to as having a shallow depth of field. The majority of the time, the backdrop will be blurry while the subject will remain in sharp focus. By raising the aperture or, alternatively, by reducing the f/ number, one may obtain a depth of field that is relatively shallow or tiny. The shallower the depth of focus, the blurrier the backdrop will be, making it an ideal choice for portrait photography. You may achieve this blurry effect by reducing the depth of field in your photograph and raising the aperture size.
Altering the distance between the camera and the subject, as well as the focal length of the lens, is another method for producing this same blurring effect. If the camera is moved closer to the subject being photographed, more of the image will be blurry, and the depth of field, also known as the region that is in focus, will be reduced as a result. A similar effect may be achieved by using a longer focal length, which will blur the backdrop.
HOW TO DECREASE DEPTH OF FIELD
Change the f-number to a lower one to open up the aperture.
Situate camera closer to topic
Distance between topics
Make the focal length longer (can use a longer lens)
While it is good to read a definition of shallow depth of field, it is also helpful to understand what all that means visually in order to assist reinforce any doubt that may still be there.
There are several different kinds of camera focus in cinema, and one of them is called “racking focus.” Watch the episode of The Shot List that is focused on depth of field and camera focus for a detailed explanation of each of these choices, which can be found here.
Let’s have a look at some examples from the world of cinema and photography now that we have a solid understanding of shallow depth of focus. The following are some of the most effective techniques that may be used to get a shallow depth of field.
SHALLOW DEPTH OF FIELD PHOTOGRAPHY
How to reduce the amount of depth that is in focus
Let’s delve a little more into the three methods that were presented earlier: modifying the aperture, shifting the distance between the camera and the subject, and thinking about the focal length. You have the option of watching Sierra’s video here, or you may continue reading.
Acquire the skills necessary to capture the blur.
Increasing the Size of Your Openings
By lowering the f-stop of your lens and opening the aperture, you may noticeably reduce the amount of depth that is in focus. The greater the aperture, the more blur will be introduced into the image or movie. Bear in mind, however, that this will also result in a greater amount of light entering the room. It is essential to your ability to balance the exposure in your photos that you have a solid understanding of what ISO is and how shutter speed works.
Bring the camera in closer to the main focus.
When you get closer to your subject using your camera, the depth of field will get more shallow. The foreground and the backdrop both get blurry as a result of this placement.
Maintain a Safe Distance Between the Subjects.
The more away the subject is from the backdrop, the more the depth of field will be substantially reduced since this creates some depth in the image. This impact will also be brought about by the distance between the individuals.
Lengthen the Focal Distance
When using a lens with a greater focal length, it is possible to produce a shallower depth of field. If you have a camera that supports interchangeable lenses and you already own a lens with a focal length of 85 millimeters or greater, you will be in a good position. Although not essential, this situation lends itself well to the use of zoom or telephoto lenses. Don’t worry if you can’t afford a longer lens choice or if you just don’t have one available to you.
You have the ability to zoom in as far as the lens will go. Because zooming in that far makes the image more sensitive to vibration, you should make sure that your camera is placed on a tripod before you begin.
PRO TIP
When working with a longer lens, you have the ability to position the camera further away from the subject while still achieving the desired shallow depth of field. In spite of the fact that, as was said before, blur occurs when the camera is moved closer to the subject, longer lenses provide photographers more leeway in selecting the appropriate distance between camera and subject.
Moving on, let’s look at some examples.
A Quick Guide To Understand Shallow Depth Of Field
As a photographer, it’s going to be a quick guide for you to know the different effects of shallow depth of field, and how to create it in your pictures. A shallow depth of field occurs when the focal plane of your shot is very shallow. It will also make the subject stand apart from all the other elements in the scene, as the depth of field itself is not at all near to the center of the picture frame. So when taking photos of a moving object, you’ll have to really adjust your focus until you get a shallow depth of field. You can use shallow depth of field techniques with any lens, and with any camera, provided you know the techniques behind them.
Why Is Shallow Depth Of Field Important?
Shallow depth of field can be created by any camera with a larger aperture, so don’t be surprised if you see this technique being used for dramatic images. The larger aperture would allow more light to go into the lens, resulting in a shallow depth of field. When using a smaller aperture, light is allowed to escape from the lens, resulting in a narrower depth of field.
If you want to know how to get a shallow depth of field, the first thing you have to do is to determine the right distance of your subject from the background. If your subject is further away, then you need to bring your aperture down a little. For example, if your subject is five feet away from the left side of the frame, then you would need to open your aperture to f/stop 4.5.
The next thing you need to know is about light. Shallow depth of field does not mean that there is not much light in this depth. What it does mean is that you need to expose the image for a longer time. This exposure time is the key to capturing the depth of field effect that you wanted.
The next thing you need to understand is focal length. If you are using a lens with a large aperture and longer focal length, you will get a shallow depth of field. On the other hand, if you use a lens with a very short focal length and smaller aperture, you will get a more expanded depth of field. So, if you want to get a more expanded background, you will need to use a shorter shutter speed, and you will want to use a shorter aperture.
A camera with a smaller sensor size and larger aperture will produce a shallow depth of field. It’s just that smaller sensors do not have a very large shallow depth of field limit. Meanwhile, cameras with larger sensor sizes and smaller apertures will produce an expanded depth of field. This expanded depth of field will make up for the smaller sensor size and aperture.
Finally, you need to understand the depth of field scales. A DOF scale is a linear measurement system that measures how much light is required to make an image with different depth values. The values range from – infinity to infinity. For instance, a DOF value of infinity would mean that there is no subject in focus. A DOF value of – infinity would mean that everything in focus including the background is in focus.
To maximize the chances of taking great photographs, make sure to keep the subject as close as possible to the middle of the image plane. Keep your camera on manual focus and try to isolate as many parts of the scene as possible. You can then use Photoshop to enhance the close-ups of your subject by making slight adjustments to focus, exposure and color. Remember to keep your camera manual as to not cause to blur at the edges of your focusing range. In addition, a depth of field filter is also a good option to take care of blurring caused by manual focusing.
What is Aperture? – Digital Photography Tips
 When you ask people to define what is aperture, most of them will tell you that it is a measurement of the width of an object’s depth. Of course, this is just a simple definition and does not offer much in the way of explanation. To give photographers a bit more help, the aperture can also be described as the difference between the diameter of an object at the center with its farthest point of light being smaller than the center. This diameter is measured in millimeters and refers to the diameter of the whole scene. In photography, the aperture is used to control the amount of light that is let into the camera to capture an image.
In photography, an aperture is used to control the amount of light that enters the camera and is responsible for the whole dynamic range of the image. In general, the wider the aperture, the fainter the objects in the scene will be. This is due to the fact that objects have a larger diameter than light, which makes them appear brighter. As a result, objects have a narrower focal length than the light, which results in less depth of field.
As stated above, the focal length is typically longer than the diameter of the whole scene. This makes the depth of field appear smaller than it actually is, resulting in blurry, pixelated images. The effect is brought about by the shorter focal length and the faster shutter speed.
What is aperture then used for? Well, in most cases you would use it to compose a photograph. For example, if you are taking a portrait photograph, you would use a shallow depth of field. A shallow depth of field allows you to get a better shot of the subject, while not having the camera pull focus when focusing on a distant object. You could then use the center-weighted or center-focal point on your picture to compose the frame.
What is aperture again in terms of image quality? It affects the depth of field, which affects both the size and depth of the entire photo. It affects the entire image as opposed to just the foreground or the background. Basically, the smaller the sensor size, the smaller the depth of field. On the other hand, the larger the sensor size, the wider the field becomes. As such, it affects the entire image.
What is aperture then used for with focus range cameras? It is typically set to select a small amount of blur for the depth of field effect. It also controls the size of the red box in the center of the focus area. The larger the red box is, the wider the focus range becomes.
What is aperture again in terms of photography? It affects exposure. A fast shutter speed will give you a very strong depth of field effect. However, a slow shutter speed will make the scene look blurry. The good exposure formula is somewhere in between, with a medium f-stop for the shallow depth of field effect and a fast shutter speed for the overall scene.
What is aperture then used for in terms of digital photography? It is used for digital SLRs to compose a much tighter scene and focus on the center of the scene rather than everything around it. This results in a much more crisp, focused background with less blurring of the edges. Using a camera with a decent depth of field feature will result in the best possible shot.
What is aperture then used for in non-SLR digital cameras? It is often used to create backgrounds that are in focus as well as sharpen up images by increasing the depth of field. When using a camera with an increased depth of field feature, the object will be in focus while everything else in the photo is blurry because of a reduced focal length. The smaller the focal length, the larger the blurry areas become. Using a smaller f-stop value and a small expanding focal length will make the background in focus while still maintaining the sharpness of the subject.
What is aperture then used for in photography? It is used in portrait photography as a means of defining the depth of field. In one example photo, the subject is in focus while everything else is blurred out. By using a bigger aperture (wide open in the camera settings) the depth of field is maintained and the entire photo is in focus.
The depth of field is an important feature of SLR digital cameras for many reasons. For instance, if you are taking a photo of your kids playing outside in bright outdoors, you do not want to have a blurry image of the backyard because the lens would be opened wide. This will ruin the entire photo and reduce your depth of field. The aperture can control the amount of blur so you can keep the focus where you want it.
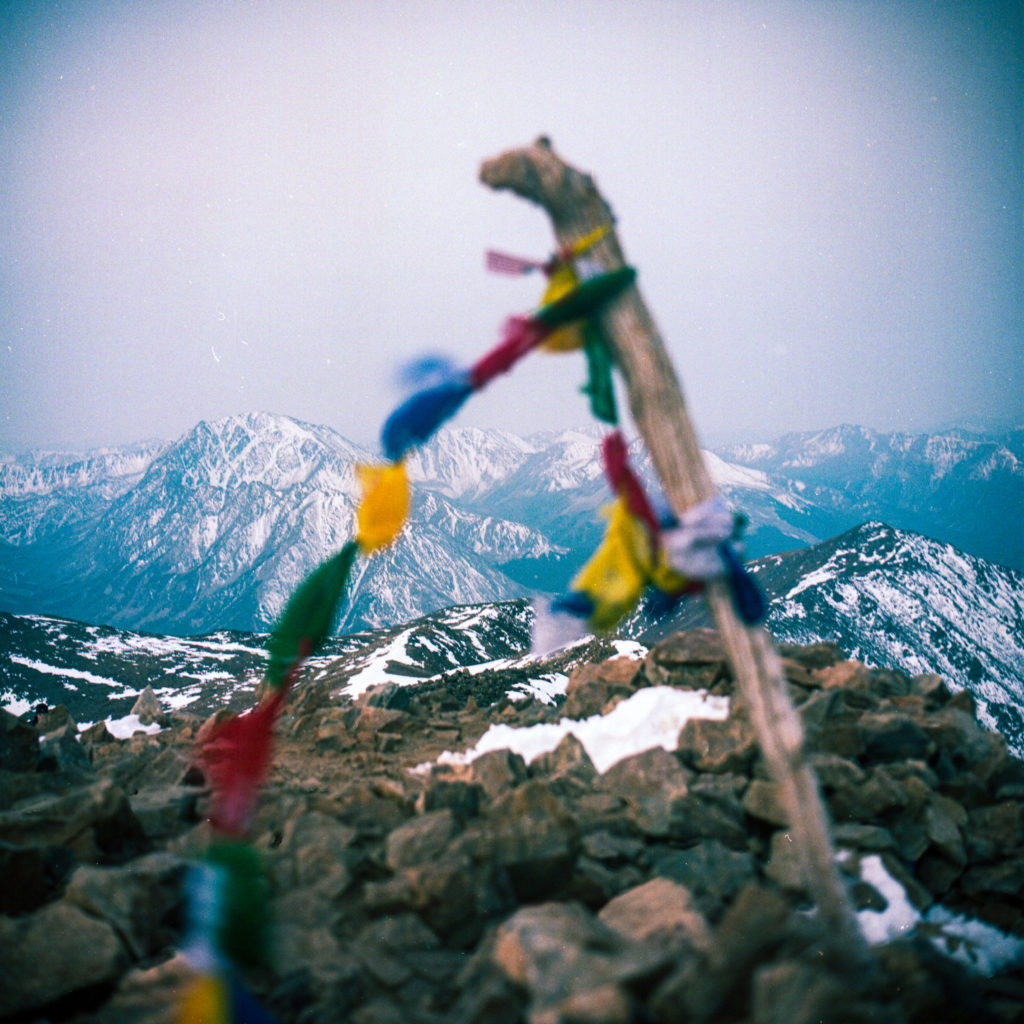
Examples Of Shallow Depth Of Field Landscape Film Photographs
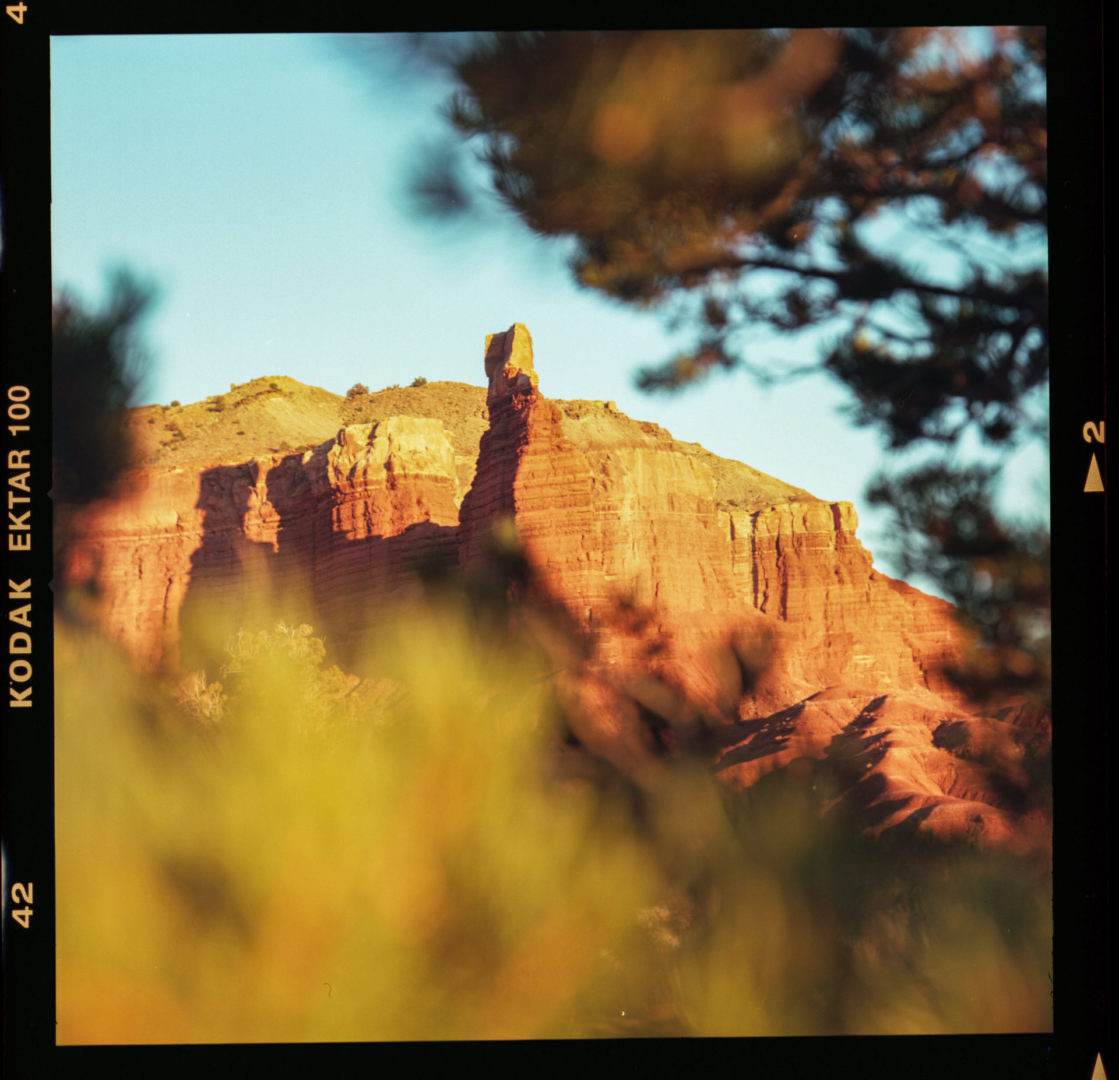
Capitol Reef Sunset Ektar 100
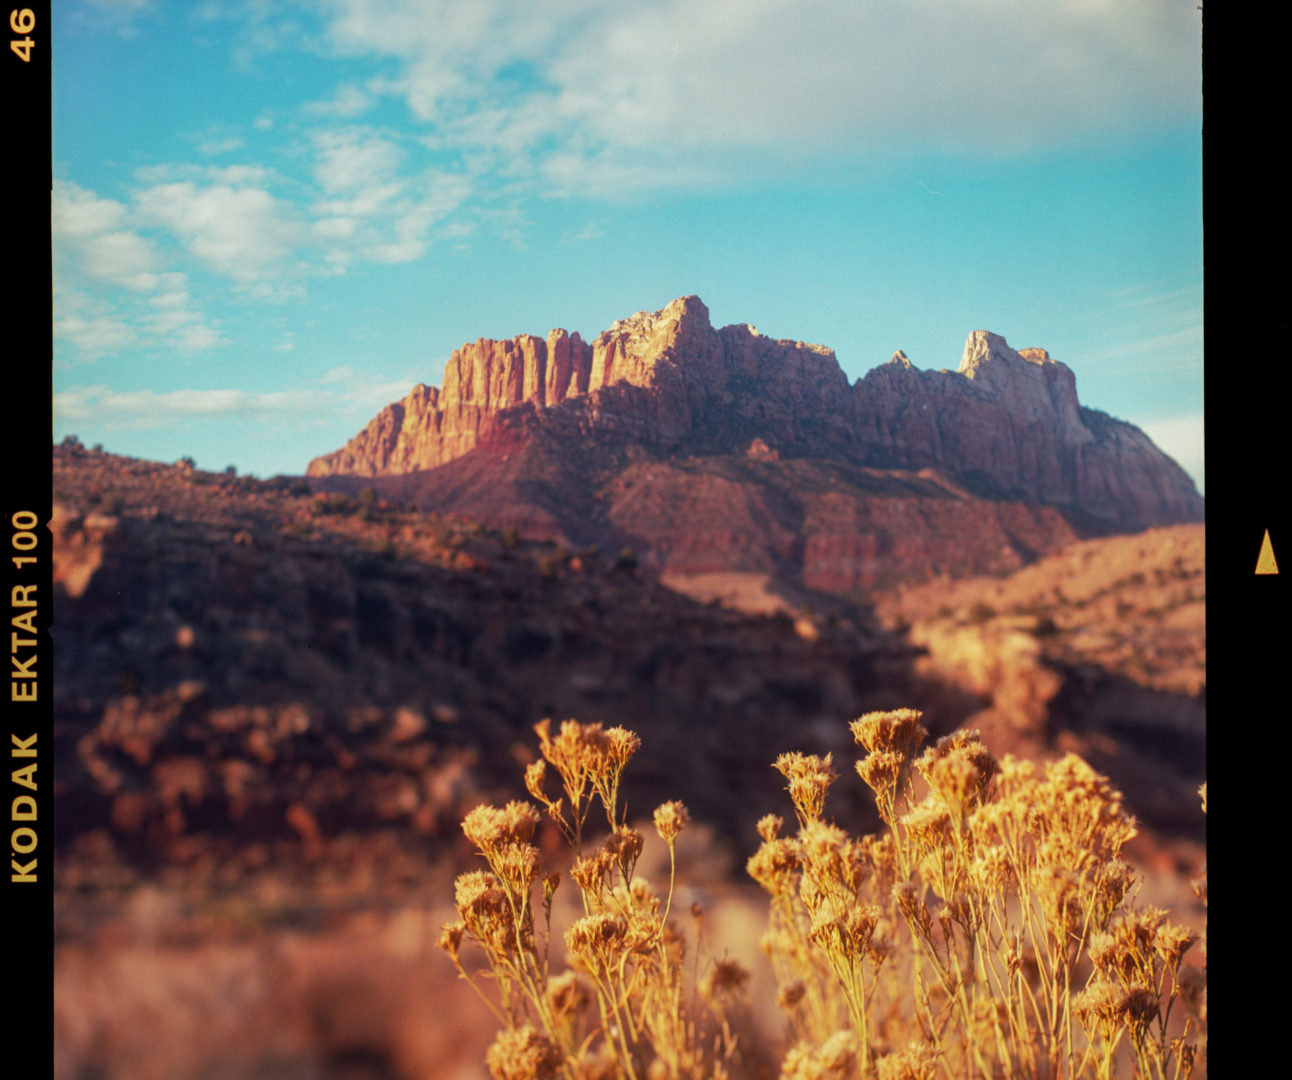
Zion Tiltable View
Silver Lake 35mm-5

Silver Lake 35mm-15
Mount-Of-The-Holy-Cross-14-801×1024 Medium Format Film
Mount-Elbert-Summit-7-1024×1024 Medium Format Film
AF Canyon June Snow-7
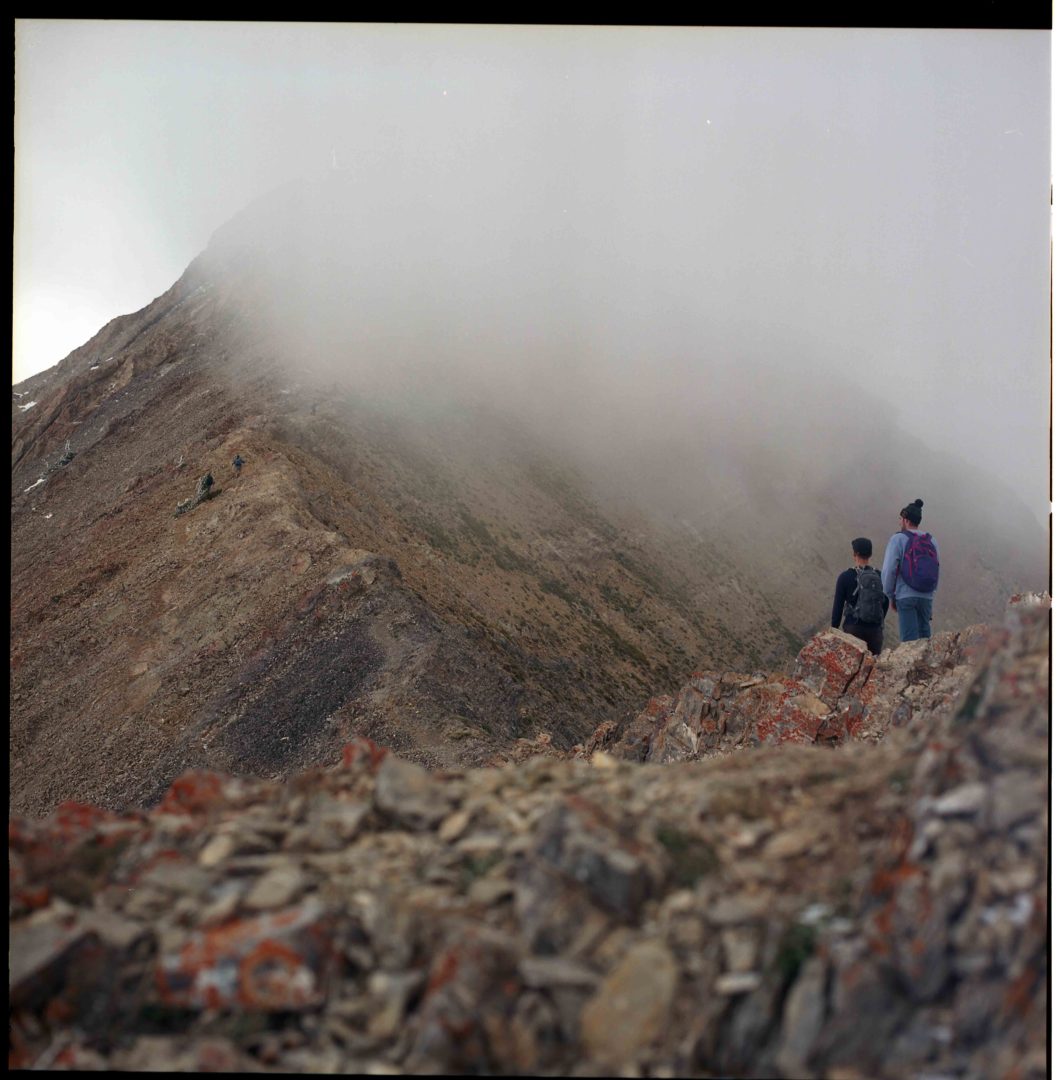
Mount Nebo Medium Format Film
How to Get a Shallow Depth of Field on Your Camera
Shallow depth of field is a great choice when you want to emphasize, enhance, or only isolate your focal point. Doing so can minimize background/foreground distracting distractions by completely blurring them out. However, a shallow depth of field isn’t always a creative tool; sometimes it can actually be counterproductive. This article discusses the pitfalls of using a shallow depth of field in your work. I’ll show you how to avoid these problems and make using a shallow depth of field a productive technique.

One problem that people often encounter when using shallow depth of field lenses is the tendency for the camera to become focused on the center of the picture. If the lens is equipped with a focusing device such as an internal focus system or external focus mechanism, this will tend to cause the background to get lost in the foreground. The effect is similar to trying to focus on a point cloud in front of your camera.
Another problem with shallow depth of field lenses is the shallow depth of field caused by using a large aperture. The larger aperture results in a more shallow depth of field. You can solve this problem by choosing a lens with a smaller aperture or by using an external motorized lens. The latter is more expensive but maybe worth it if you are doing your research and planning on using a smaller aperture.
One of the reasons why an aperture diameter of f/stop is bigger than the actual aperture diameter on the camera is because of the motorized aspect. Many digital cameras have a one-stop system. This means that the camera automatically stops the lens at one stop and then automatically increases the aperture. In photography, one-stop can mean a millionth of a second. So, if you want to create a shallow depth of field, use a faster shutter speed and a smaller aperture.
One trick in getting good exposure with a lens is to use a wide-angle lens. This type of lens has a large diameter which allows for a very shallow depth of field. Also, using a lens with a large diameter will give you more shutter speed and more focus variation.
Some photographers have the habit of increasing the aperture size during the actual process of taking the pictures. This is usually done by setting the camera to shoot in RAW format. This can be done by clicking “oko” (scattering), then hold down the shutter button and then click “set aperture”. This gives you a blurry priority mode which lets you decide on a blurry background effect.
When you are learning how to get a shallow depth of field, it is important to use a telephoto lens. However, don’t assume that just because you are using a telephoto lens that you are getting a shallow of field. A digital SLR camera generally has an in-camera digital aperture size and so they can determine the focal length right from the sensors readout. This is different from film SLRs, which rely on the aperture size and the focal length recorded in film.
One thing to keep in mind is that the shallow depth of field effect can also be created by a large sensor. For instance, with a 35mm camera the sensor might magnify light very quickly. If you set the aperture size to large, the camera would see a blurry background even at long distances. This is the same reason why the shallow depth of field effect is sometimes called “cringe” or “fisheye”. As with anything else, experiment and find the most comfortable setting for your individual photography style.
Examples Of Shallow Depth Of Field Film Portrait Photographs

SLC Spring-6

Millcreek Canyon July 2020 Portraits-19
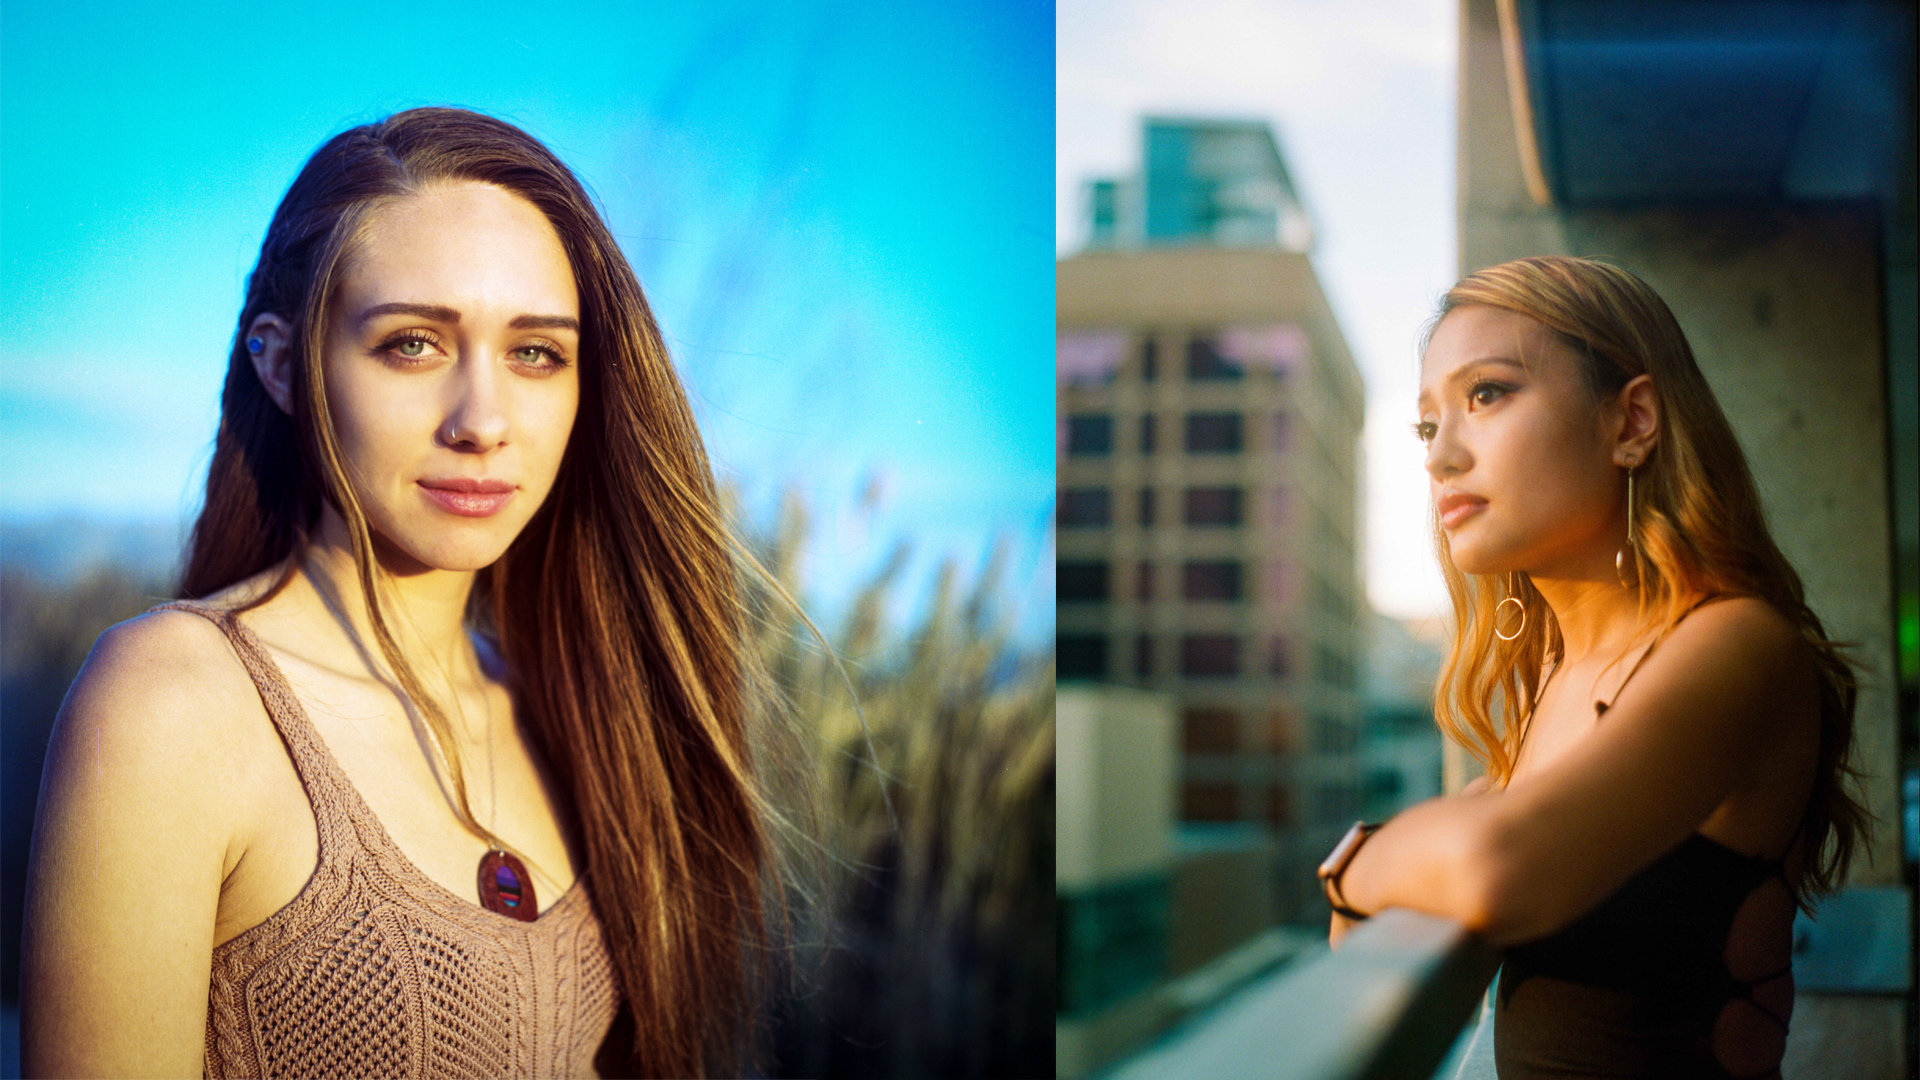
Portrait Landscape Pics
Portrait Photography Hasselblad

Hi, just wanted to tell you, I enjoyed this post.
It was helpful. Keep on posting!